Technique in Focus : Frank Stella’s Moby Dick domes
The creation of the three-dimensional Moby Dick (domes) series 1992 was one of the most technically challenging printmaking projects that KENNETH TYLER and FRANK STELLA undertook in over thirty years of collaboration, spending nearly six years perfecting a process that pushed printmaking into a new dimension. Tyler shares insight into how this groundbreaking project came to fruition.
'The Domes project started in August 1986 with our making of 40″ (101.6cm) diameter by 5 1/4″ (13.3cm) high concave un-pressed paper pulp pieces in the paper mill for Frank to use to make sculptural models in his studio. In the models, he attached cut-outs of printed waves weaving them together and wrapping around the paper domes.
The intention was to make a three dimensional paper work that would hang off the wall similar to the multiple Playskool Bobbin that we made in 1983. Frank finally decided in order to develop these paper sculptures into print editions that the dome in high relief would have to be convex and be anchored to a flat background without any attached elements like his models and sculptures had. This he considered necessary to define the shaped work as a print and not as a sculpture.
While Frank began creating collages for the flat background plates, I started to work through the technical challenge of making dome shaped papers and etching and printing a dome shape. First, I outlined in five steps what I thought was needed to resolve the technical issues for this project.
Step one was to collaborate with Bob Swan on making one section of Jonah historically regarded as a flat deeply etched magnesium plate. We started out trying to solve the construction of a dome printing element by making rubber impressions of the flat plate which we assembled on a concave surface to form a shaped rubber printing plate. Our attempts were not satisfactory so we abandoned this plan and decided to have thick magnesium spun into domes which could then be etched with Frank’s designs. While trying to figure out how to etch the image into the concave dome plates, we discovered that by photographing the newly made flat collages and making positive films that we could then cut up the films into wedge shapes (similar to a cut orange skin cut in wedge-like sections and peeled back) and then assemble these shaped films onto a magnesium concave dome and photo-etch it. Many months and trials later we succeeded in producing an etched concave surface with one of Frank’s image. Step one was completed.'

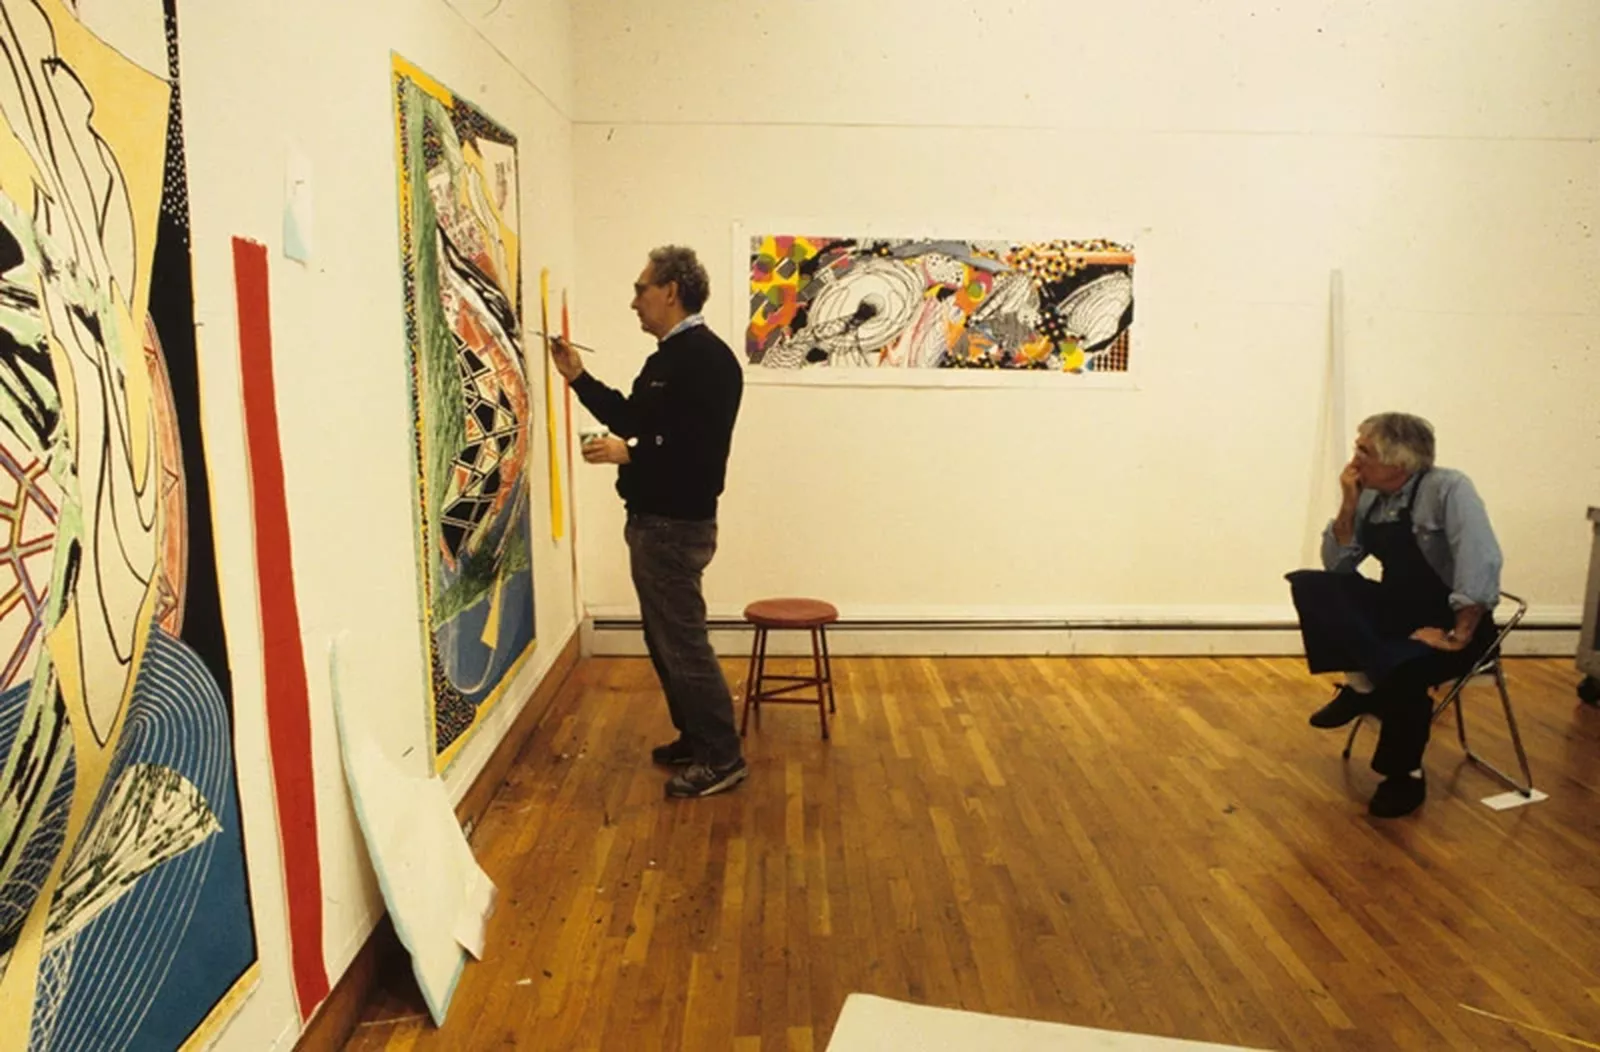
Frank Stella in the artist studio working on one of the maquettes for his ‘Moby Dick Domes’ series, Tyler Graphic Ltd, Mount Kisco, New York, May 1988. Photo: Marabeth Cohen-Tyler

Kenneth Tyler working on one of the shaped magnesium dome plates for Frank Stella’s ‘Moby Dick domes’ series, Tyler Graphics paper mill, Mount Kisco, New York, May 1988. Photo: Marabeth Cohen-Tyler
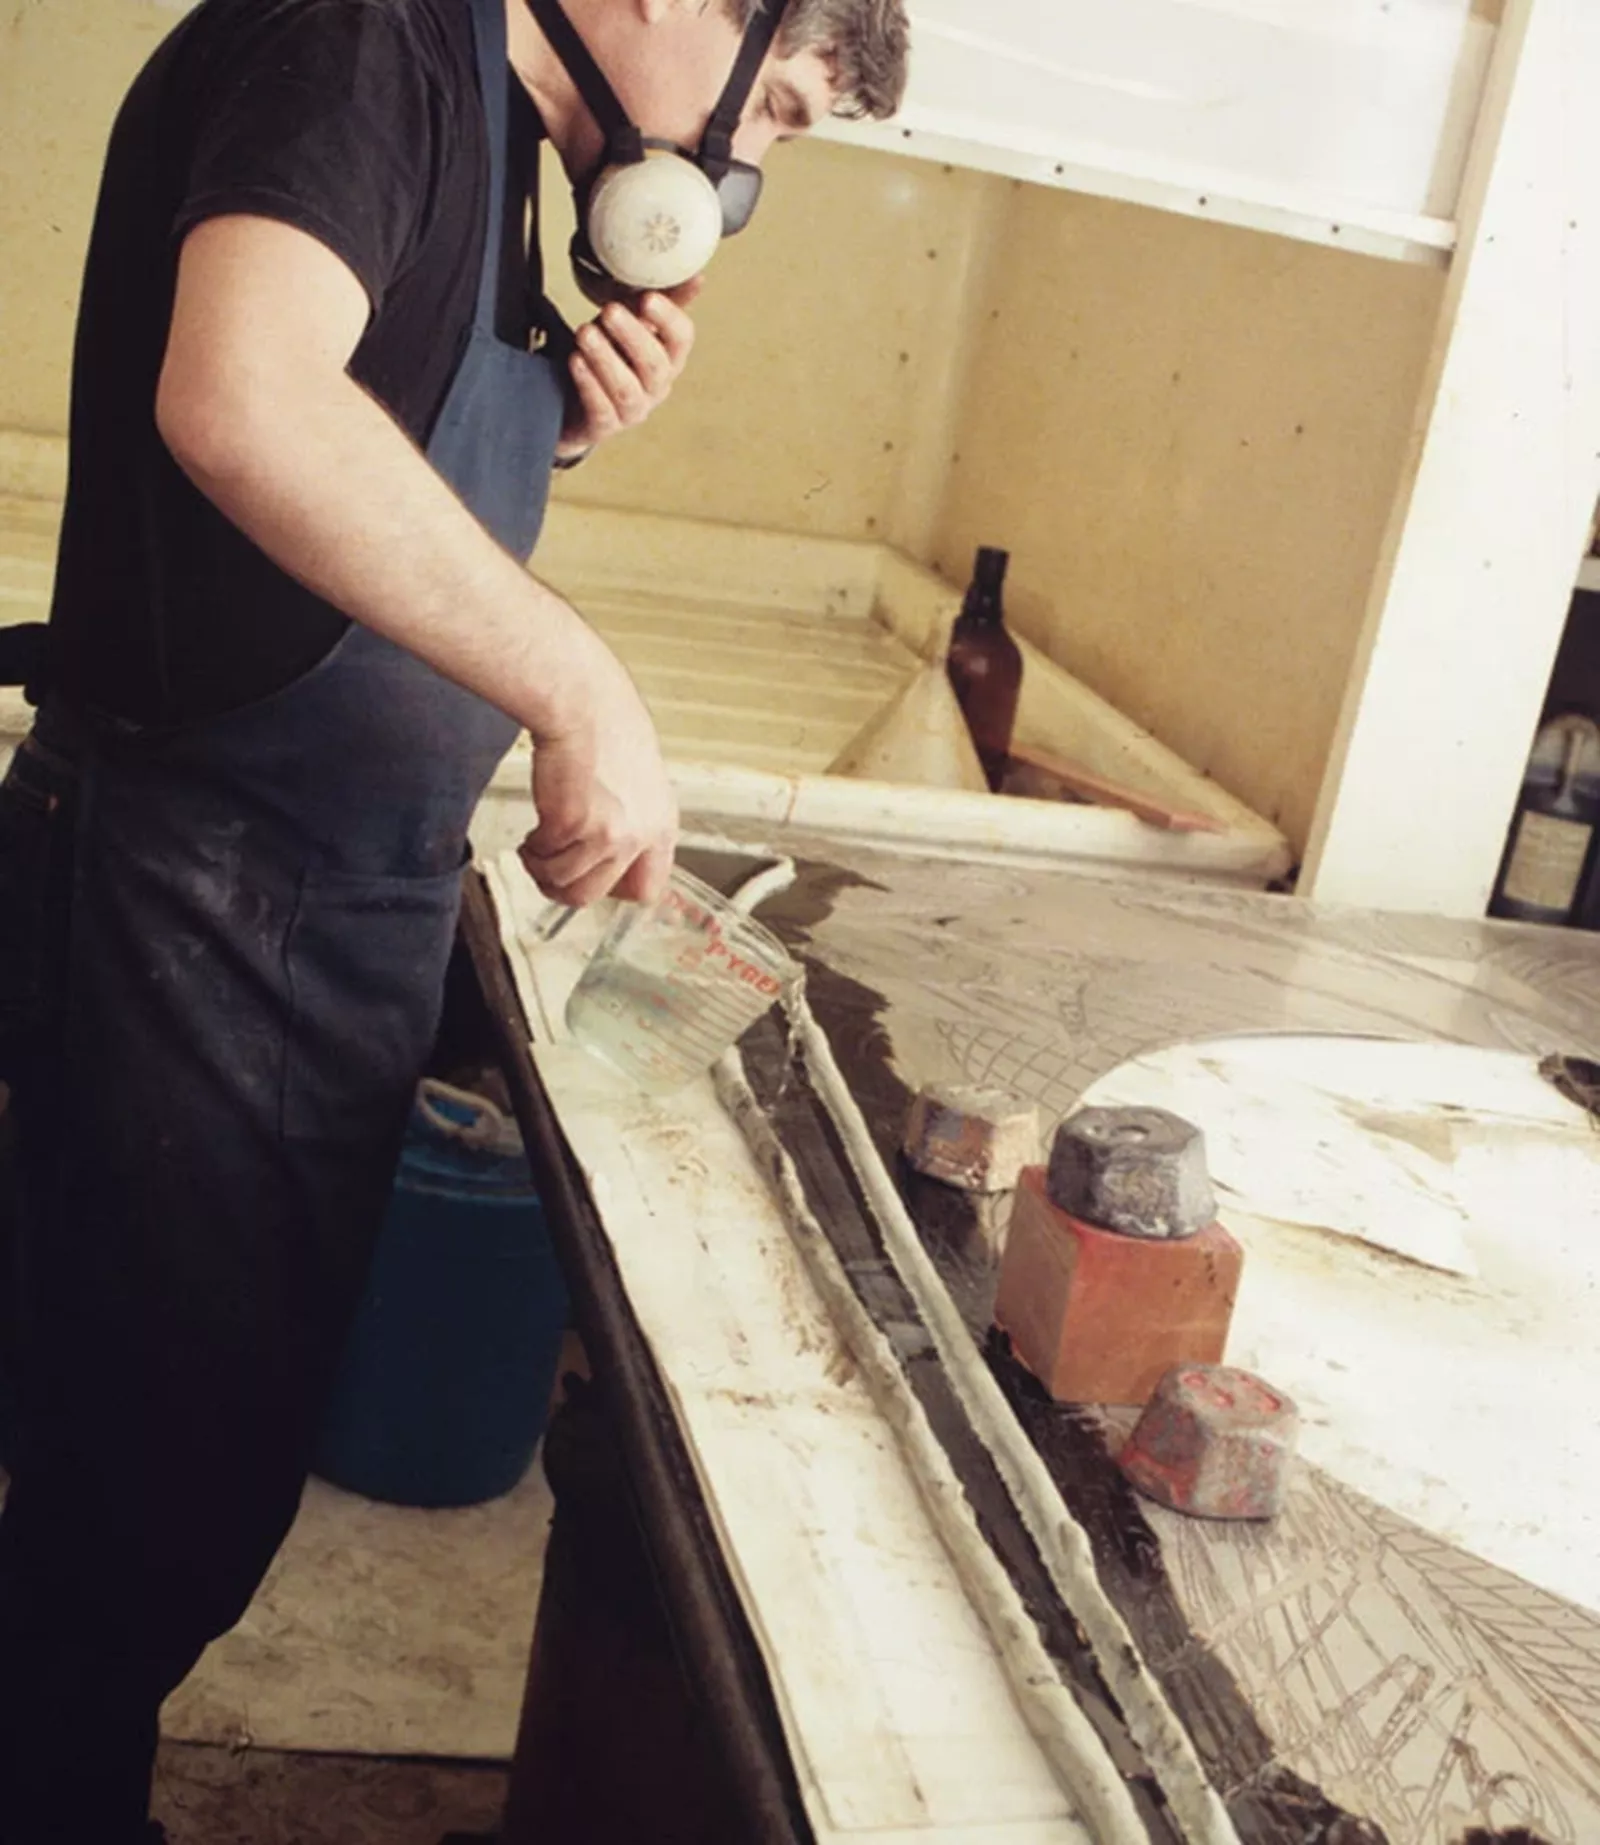
Anthony Kirk etching with acid one of the magnesium plates from Frank Stella’s ‘Moby Dick domes’ series, Tyler Graphics acid room, Mount Kisco, New York, May 1990. Photo: Marabeth Cohen-Tyler.
'Once the flat plate of the print was made, it was a simple task of positioning the dome plate onto its surface and then cutting out the circular shape from the plate. The cut out section from the flat plate became the image for the etched dome plate. Step two done.
Simultaneously I was collaborating with our paper consultant, Lee McDonald, on the construction of a vacuum forming mould to make the 731/2′ x 53″ papers with a convex dome shaped center the same dimensions as the spun metal dome. Meanwhile the workshop built a drying hood to dry the newly made dome shaped papers. It was necessary to used dry dome paper slightly dampened for printing. Step three completed.
Once we had the shaped paper mould that could make vacuum formed paper domes, we still needed to make a two part mould that could both press the newly made dome paper and also print the inked dome and flat plate assembly in the paper mills hydraulic platen press. I had another of our outside collaborators, Tom Vieweg, construct a two part steel mould conforming to the dome shape with flat plate for pressing impressions from the inked plates into the shaped paper in the hydraulic platen press. Step four was under way.
Newly formed paper pulp for Frank Stella’s ‘Moby Dick Domes’ series adhered to shaped vacuum mould being lifted out of the paper pulp vat, Tyler Graphics paper mill, Mount Kisco, New York, 1991. Photo: Steven Sloman
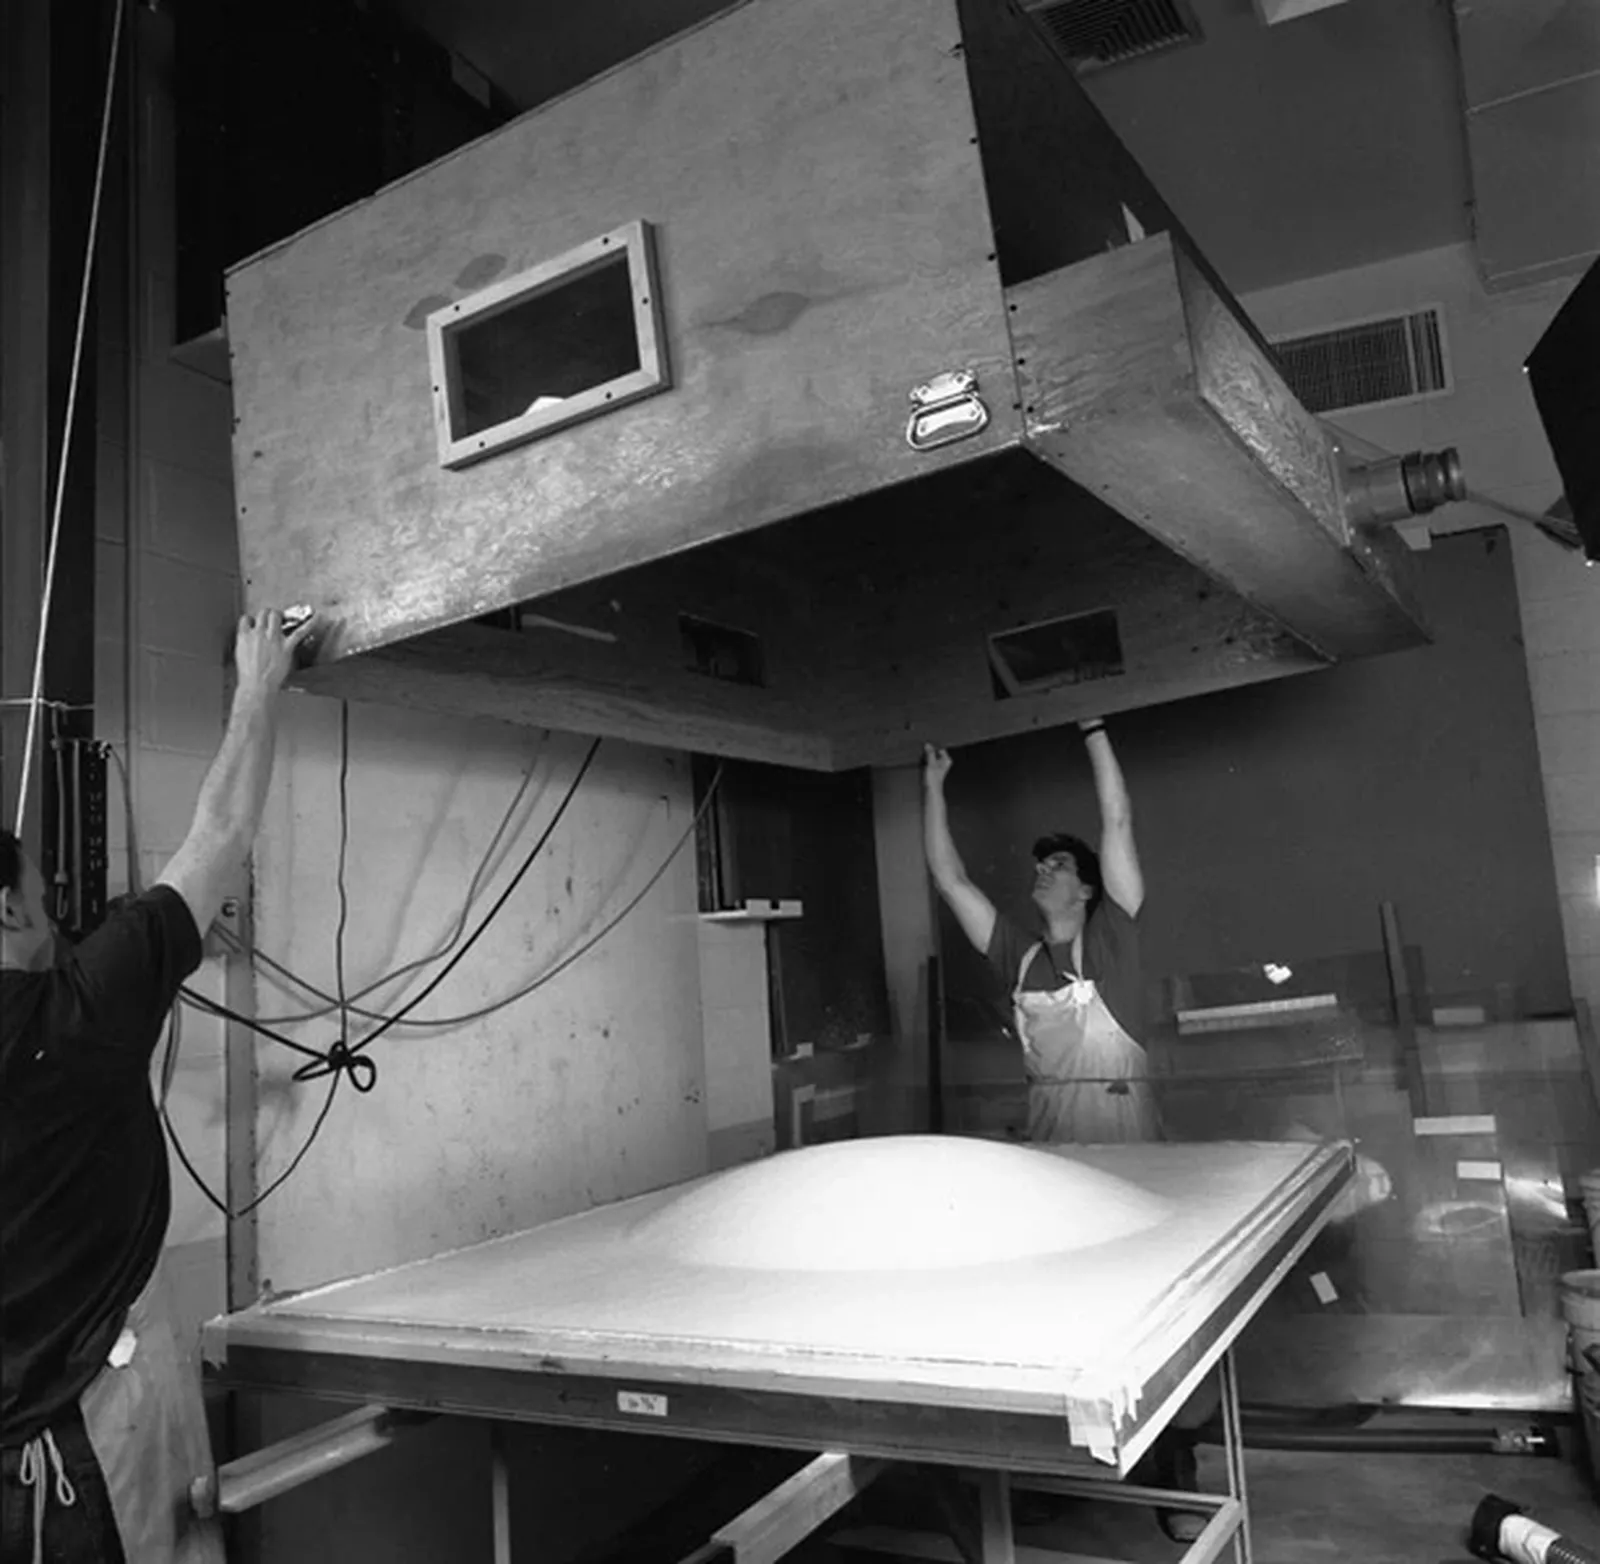
Jed Marshall (left) and Tom Strianese lowering the Frank Stella ‘Moby Dick Domes’ shaped papermaking vacuum mould into the vat of paper pulp, while vacuum suction pulls the pulp slurry against the submerged mould, Tyler Graphics paper mill, Mount Kisco, New York, 1991. Photo: Steven Sloman

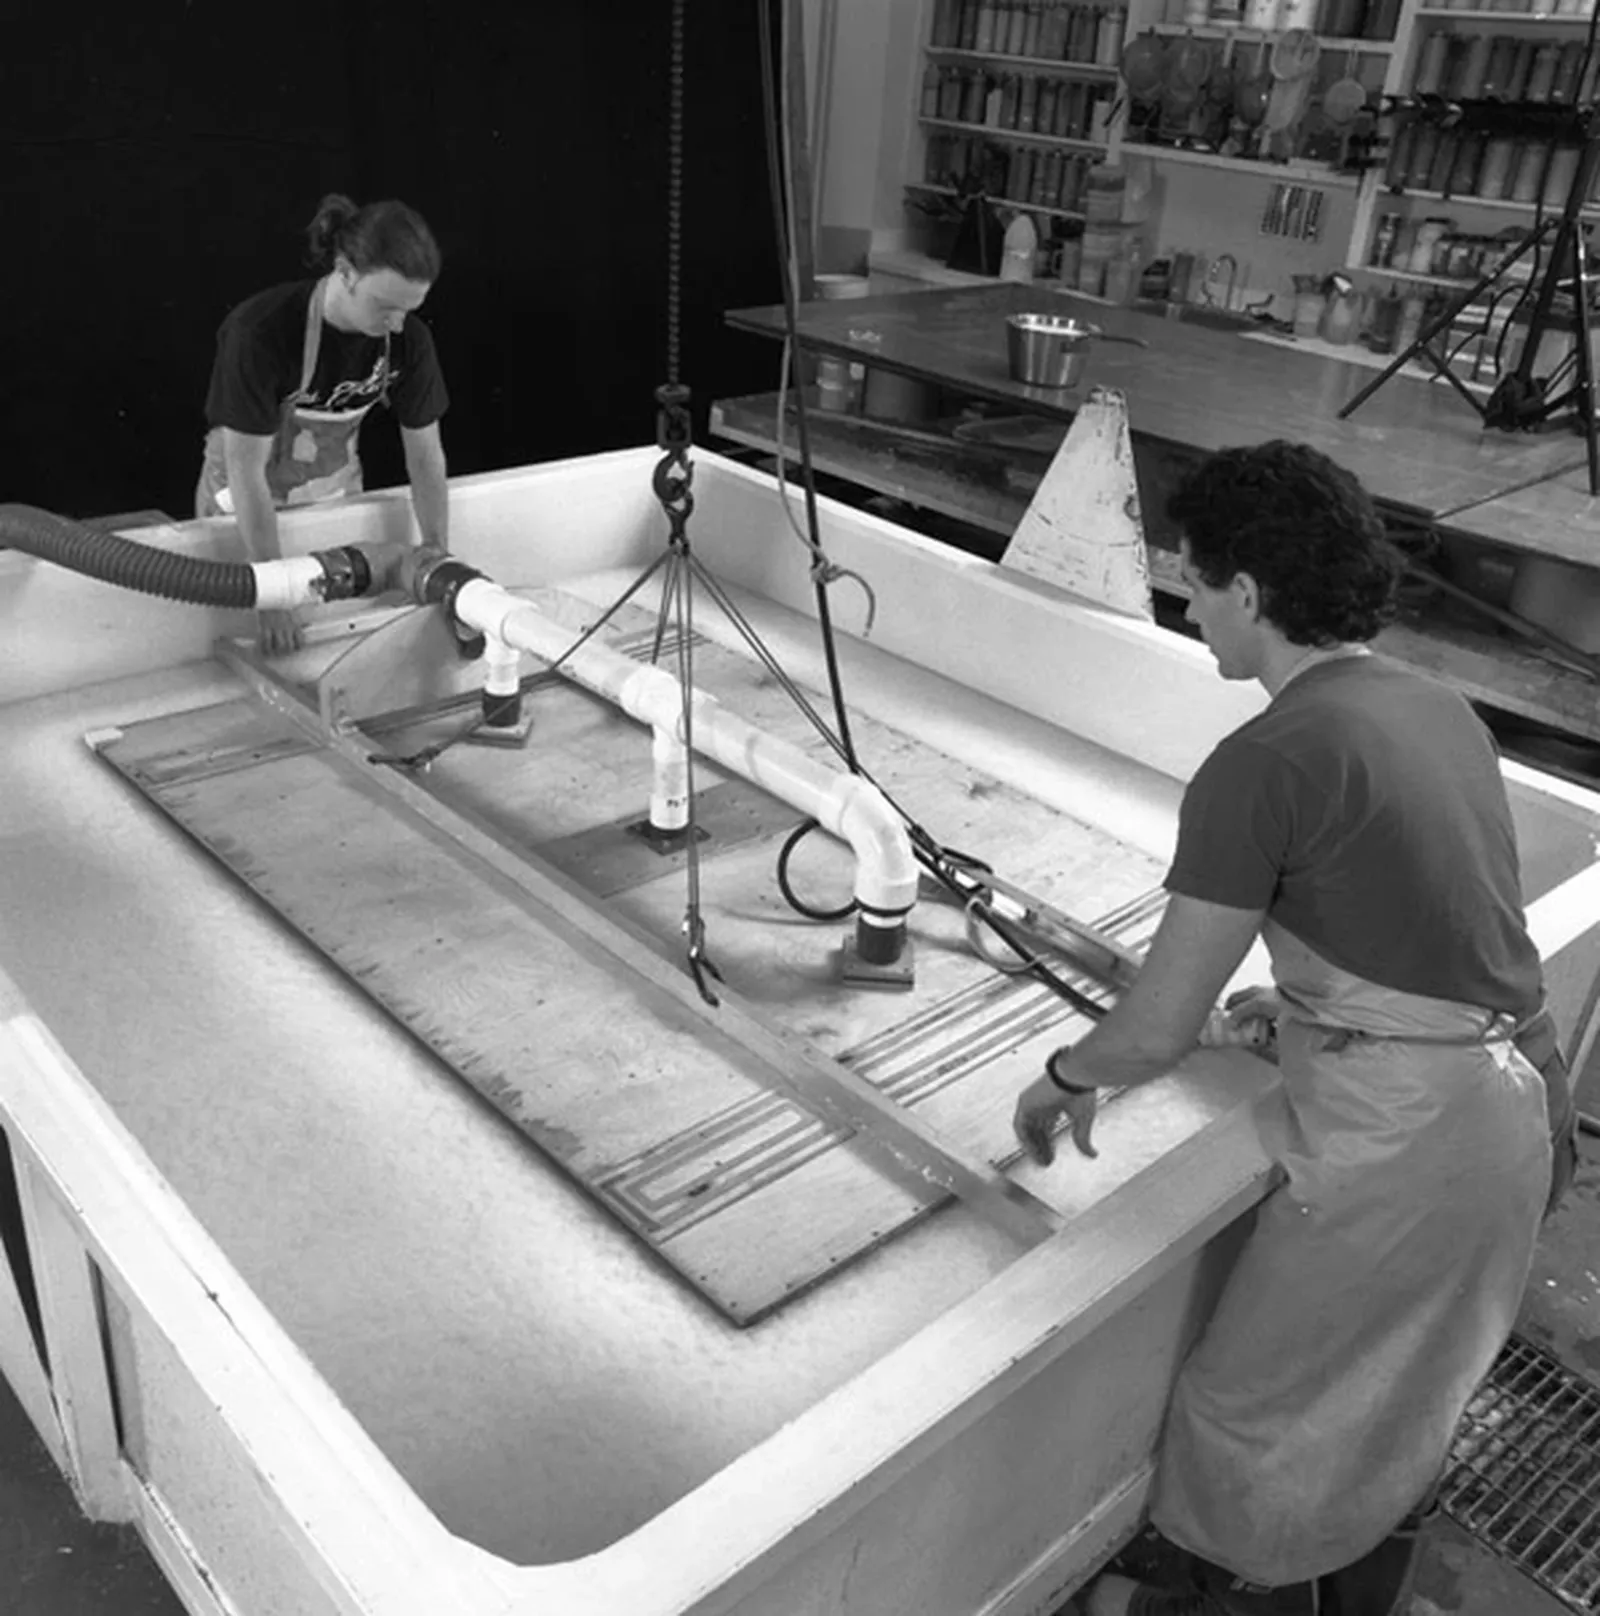
Tom Strianese (left) and Jed Marshall lower newly formed paper pulp dome adhered onto shaped vacuum mould into felt-lined ‘female’ half of mould on hydraulic platen press bed, for Frank Stella’s ‘Moby Dick Domes’ series paper to be pressed, Tyler Graphics paper mill, Mount Kisco, New York, 1991. Photo: Steven Sloman

The shaped vacuum papermaking mould is attached to a pivot and disconnected from the electric hoist and vacuum tube so that it can be rotated face-upwards, Tyler Graphics paper mill, Mount Kisco, New York, 1991. Photo: Steven Sloman

The shaped vacuum papermaking mould for Frank Stella’s ‘Moby Dick Domes’ series is attached to a pivot and rotated so that the newly formed paper pulp sheet faces upwards, Tyler Graphics paper mill, Mount Kisco, New York, 1991. Photo: Steven Sloman
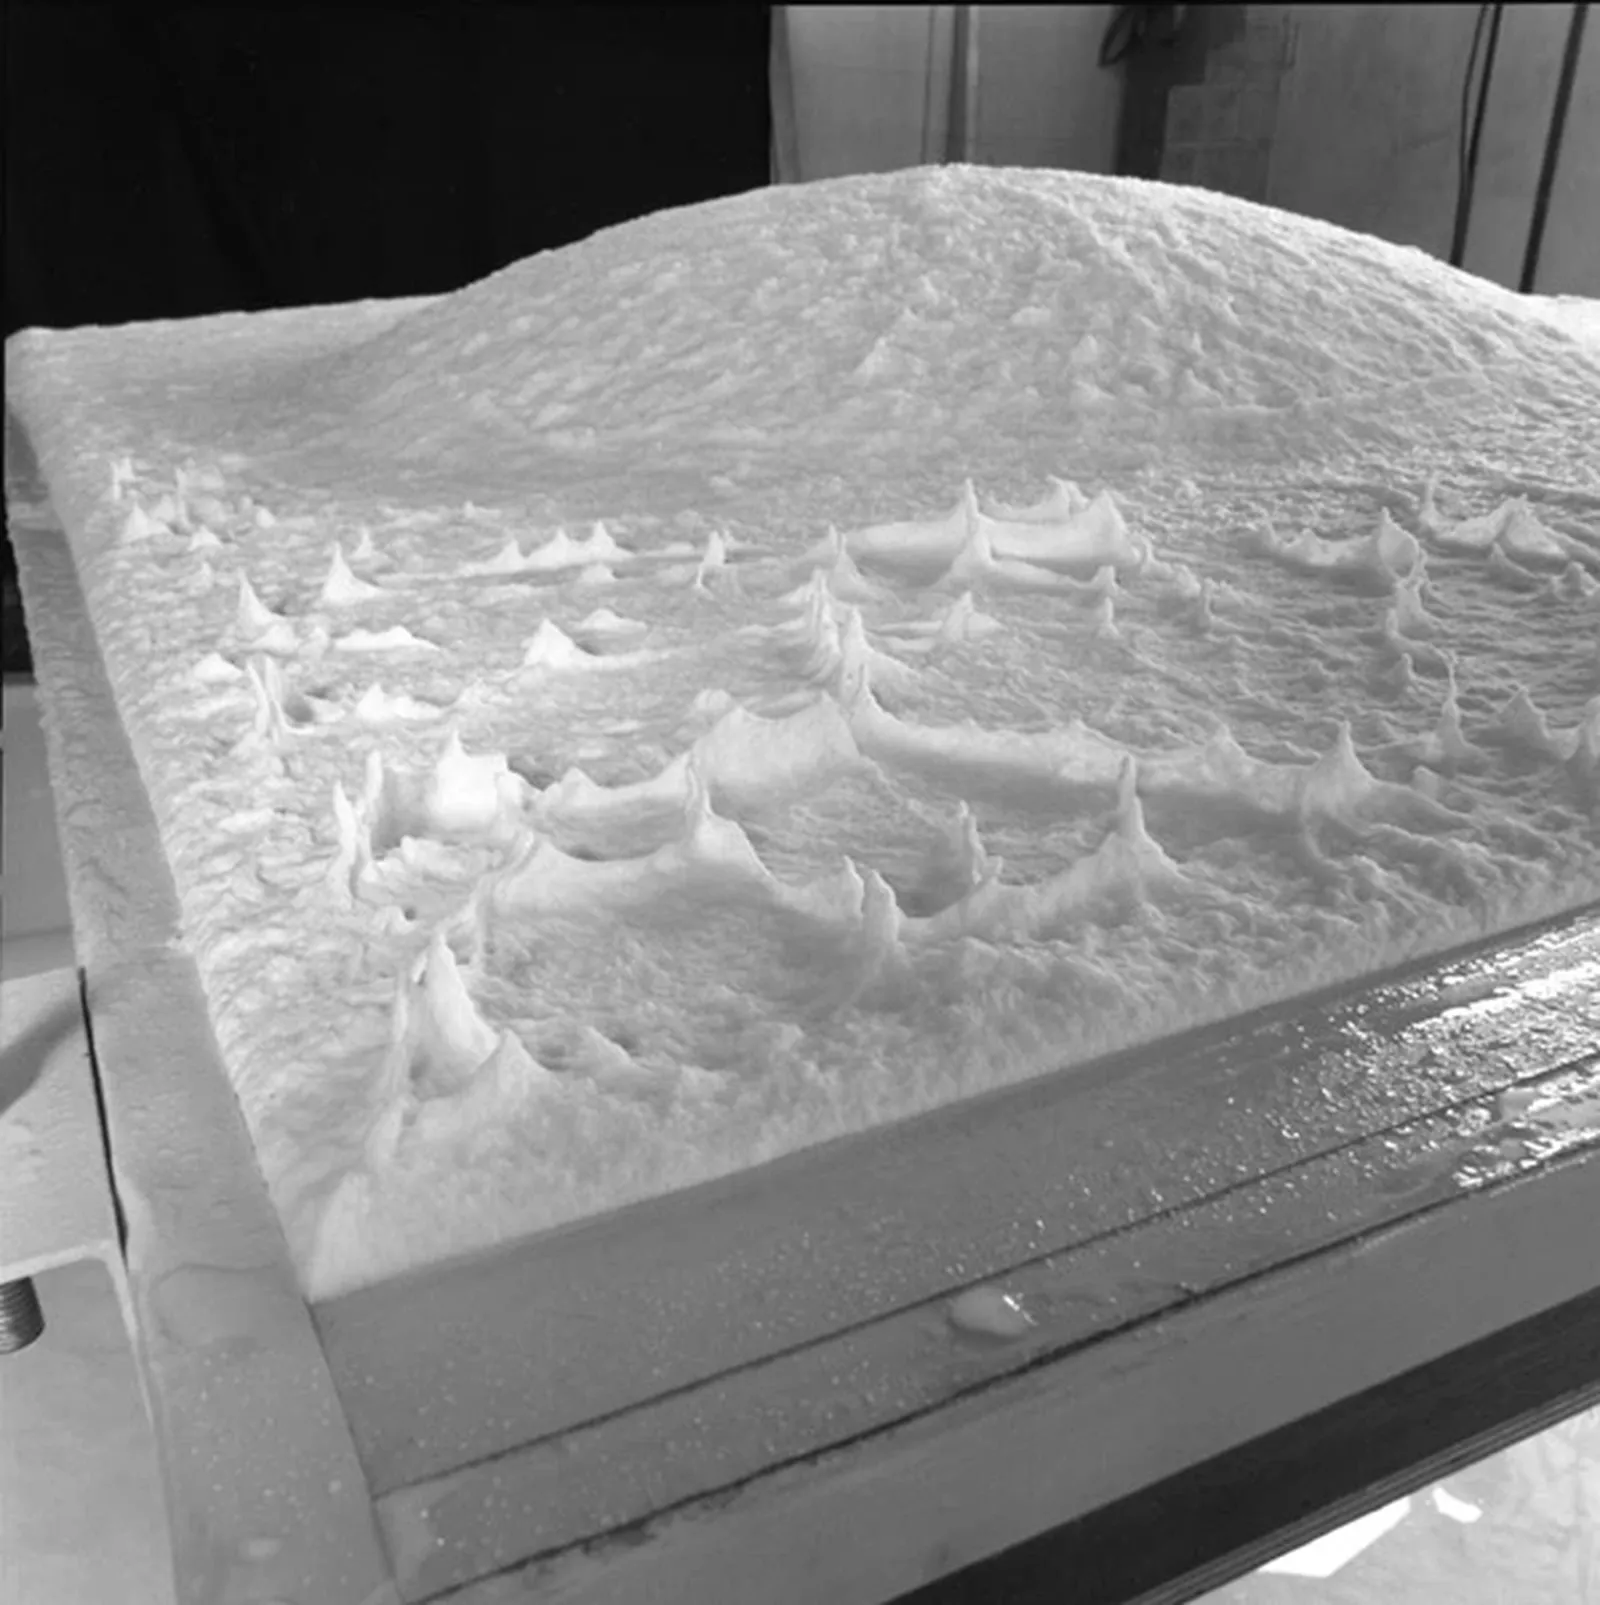
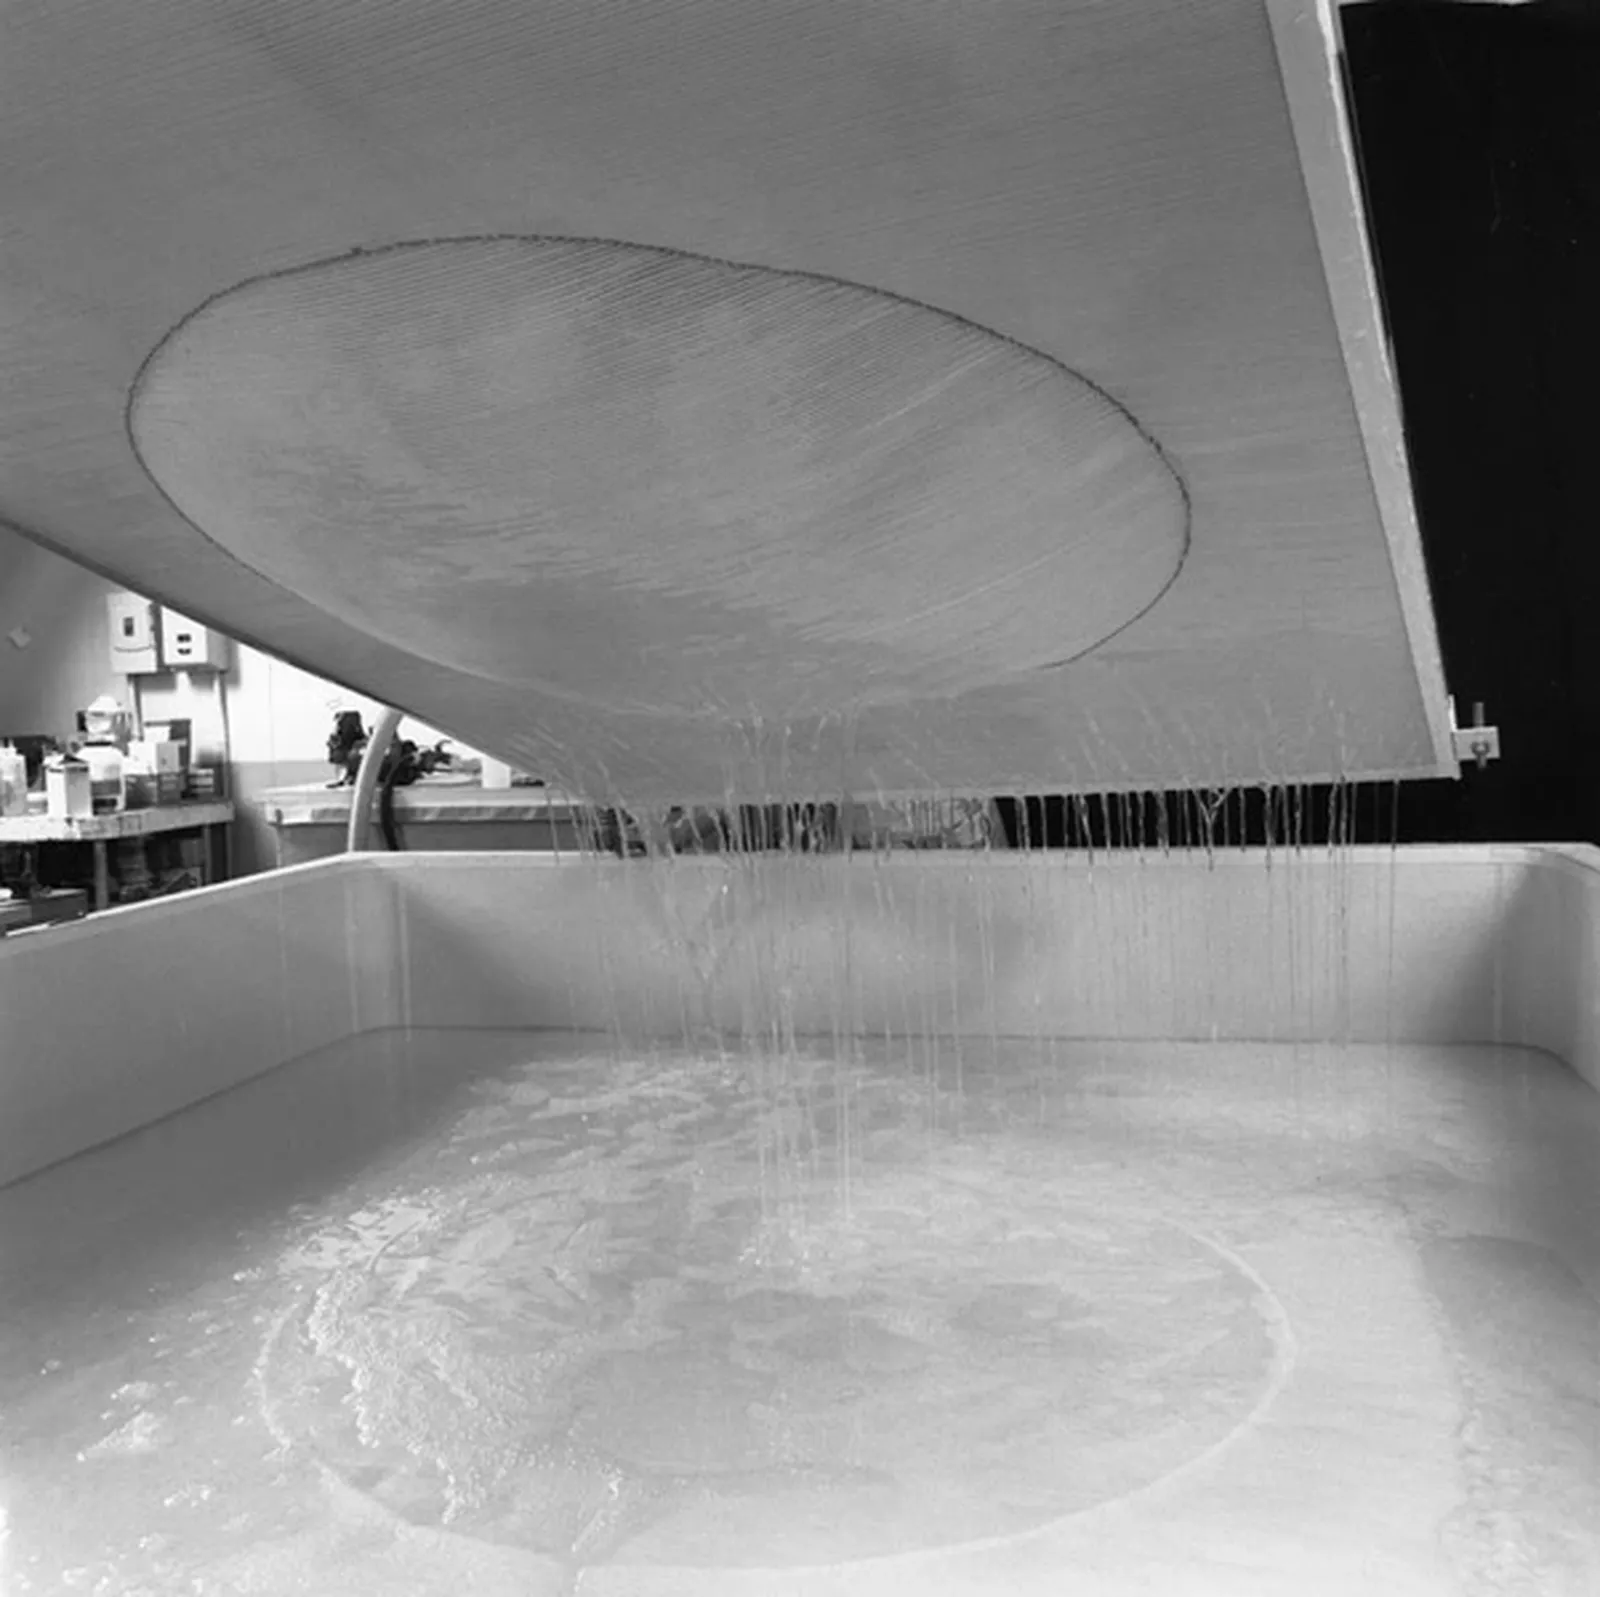
Close up view showing newly vacuum formed paper pulp sheet draining excess water over paper pulp vat for Frank Stella’s ‘Moby Dick Dome’ series, Tyler Graphics paper mill, Mount Kisco, New York, 1991. Photo: Steven Sloman

While newly vacuum formed paper pulp sheet is draining excess water over paper pulp vat, Tom Strianese adds pulp along the perimeter of the dome-shaped section, flattening the edges and strengthening the paper pulp structure for one of Frank Stella’s ‘Moby Dick Domes’ series papers, Tyler Graphics paper mill, Mount Kisco, New York, 1991. Photo: Steven Sloman

Tom Strianese hosing down protruding area of pulp on newly vacuum formed shaped paper pulp for one of Frank Stella’s ‘Moby Dick Domes’ series papers, Tyler Graphics paper mill, Mount Kisco, New York, 1991. Photo: Steven Sloman

After spraying with water, Tom Strianese and Jed Marshall rotate again the Frank Stella ‘Moby Dick Domes’ paper pulp sheet that is adhered to the shaped vacuum mould and attach it to the mechanical hoist for moving, Tyler Graphics paper mill, Mount Kisco, New York, 1991. Photo: Steven Sloman
Tom Strianese (left) and Jed Marshall lower newly formed paper pulp dome adhered onto shaped vacuum mould into felt-lined ‘female’ half of mould on hydraulic platen press bed, for Frank Stella’s ‘Moby Dick Domes’ series paper to be pressed, Tyler Graphics paper mill, Mount Kisco, New York, 1991. Photo: Steven Sloman


The vacuum suction is reversed, releasing the newly made paper pulp sheet for Frank Stella’s ‘Moby Dick Domes’ away from the shaped vacuum mould into the felt-lined shaped form of the pressing mould on the hydraulic platen press, Tyler Graphics paper mill, Mount Kisco, New York, 1991. Photo: Steven Sloman
Tom Strianese and Jed Marshall lower felt-covered ‘male’ half of mould, sandwiching the newly made ‘Dome’ paper between top and bottom of the form, Tyler Graphics paper mill, Mount Kisco, New York, 1991. Photo: Steven Sloman

View of newly made paper pulp dome sheet for Frank Stella’s ‘Moby Dick Domes’ on felt-lined mould, before the ‘male’ half of the mould is positioned in registration on top and pressed in the hydraulic platen press, Tyler Graphics paper mill, Mount Kisco, New York, 1991. Photo: Steven Sloman
'I knew since we never printed from a convex surface that we would need time to resolve how to keep the ink from flowing out of the etched lines and sliding down to the centre of the dome. What ever we eventually came up as an ink consistency, the ink had to release onto the dome paper with the same ease as the ink form the flat plate. After weeks of failed attempts we finally solved our inking and printing problems.
I like to think that Frank and I never doubted each other’s role as creator and collaborator, but there were moments during this period that neither of us were that confident. There were also moments when some of the etchers were thinking about career changes.
We persevered and once Step five was completed, we were ready to start proofing the Moby Dick Engravings.'

Kenneth Tyler lifts an experimental impression from a shaped magnesium printing element from one of Frank Stella’s ‘Moby Dick Domes’ series of works, Tyler Graphics paper mill, Mount Kisco, New York, June 1988. Photo: Marabeth Cohen-Tyler

Mark Mahaffey and Tom de Bolt applying ink to shaped magnesium plate for ‘The Funeral (Dome)’ for Frank Stella’s ‘Moby Dick Domes’ series, Tyler Graphics Ltd., Mount Kisco, New York, 1988. Photo: Marabeth Cohen-Tyler

Kathy Cho inking one of the shaped magnesium printing elements for ‘The Funeral (Dome)’ work from Frank Stella’s ‘Moby Dick Domes’ series, Tyler Graphics workshop, Mount Kisco, New York, February 1990. Photo: Marabeth Cohen-Tyler

Mark Mahaffey carrying newly inked magnesium printing element for ‘Stubb & Flask kill a Right Whale (Dome)’ to paper mill for printing from Frank Stella’s ‘Moby Dick Domes’ series, Tyler Graphics workshop, Mount Kisco, New York, May 1988. Photo: Marabeth Cohen-Tyler

Anthony Kirk positioning shaped magnesium printing element for ‘Stubb & Flask kill a Right Whale (Dome)’ from Frank Stella’s ‘Moby Dick Domes’ series to flat magnesium printing element, both in ‘female’ section of two-part printing mould on hydraulic platen press bed, Tyler Graphics paper mill, Mount Kisco, New York, March 1991. Photo: Steven Sloman
'Our plan was to complete one edition of the engravings before the plate was reworked and paired with the dome plate to become a Moby Dick dome print. At this point I stopped referring to this work as prints and started calling them "works beyond prints." For this project Frank encouraged the printers to off-register proofs, employ monoprint inking (which he participated in) and change the printing pressure to alter the inked impressions for each of the printing plates. He discovered in the making of these unique proofs new surface qualities for his printmaking. When he selected a certain printed ink quality or registration he liked, it was then up to the printers to retrace their proofing history to recreate these chosen qualities in a new proof that would become the edition standard. Working as a team the printers and I kept notebooks, ink samples, made printing order charts and labeled each proof with the sequence of printing order, all of these steps mapped out the way to create these unique proofs.'
Frank Stella, Jonah historically regarded, state I, 1991, National Gallery of Australia, Kamberri/Canberra, Gift of Kenneth Tyler 2002. © Frank Stella. ARS/Copyright Agency.
'This new methodology for making prints was time-consuming, adding many months to the editioning process and kept the printers constantly under pressure to get the inking just right for each new impression. The duration of time that the ink could stay in the plates before printing was crucial. The printers had to time each task to keep on a schedule that would prevent the ink from drying in the plates.
The artist’s with his critical eye and tendency to refocus with every alteration in printing style often led him to make changes in the print. This compounded the rigors of our new unorthodox printing method. Nevertheless Frank and I agreed that the stunning results that were achieved discounted any temptation to cut corners and simplify the process.
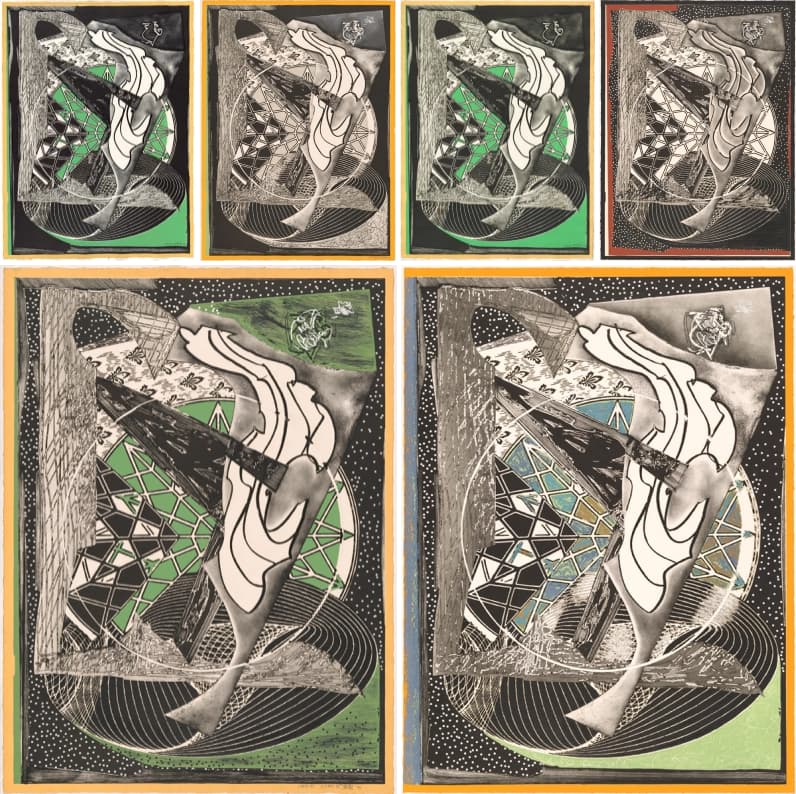
It was not unusual for him to interrupt proofing to make color changes or alter the method of inking the plates and on two occasions he stopped edition printing to make additional changes. The first event occurred shortly after we released the five Dome prints; he decided to continue working on Jonah historically regarded (dome) adding 23 colors using the techniques of screenprint, stencil and hand-coloring. Five of the edition prints were sold before these additions was made, however I issued no recalls to replace the prints and none of the five prints were returned. Difficult to understand collector’s sometimes. The second time he would stop an edition printing so he could make an addition was with the Fountain in 1992.'
Art & Artists
Featured

1936-2024